Zoom in
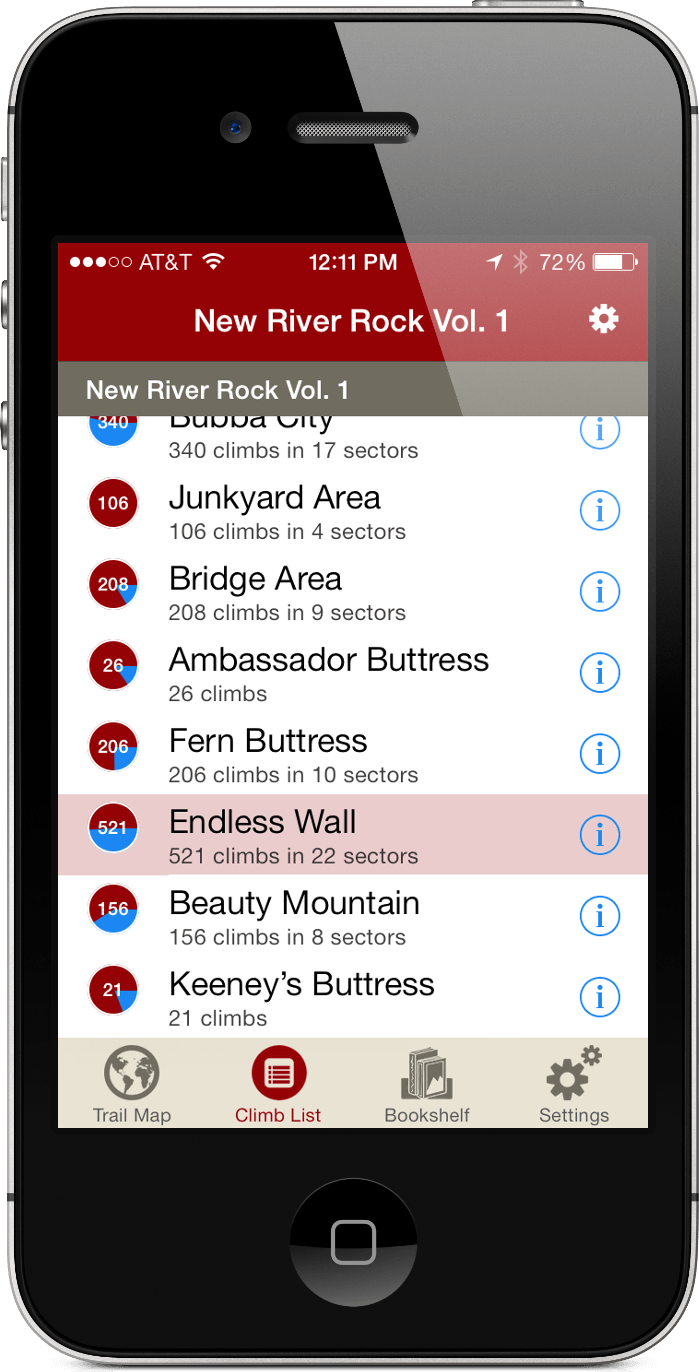
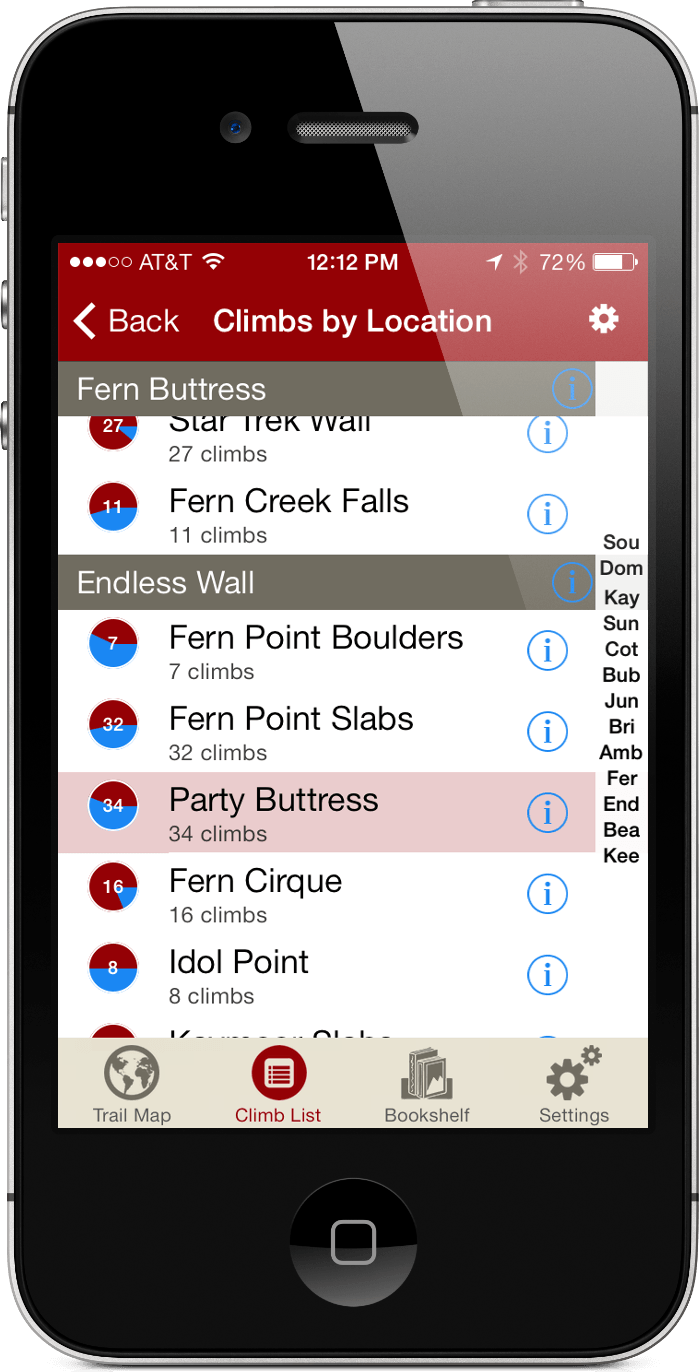
With rakkup, you can explore a climbing area visually through maps and images, or you can get straight to the details you’re looking for by searching and filtering. Keep reading for more info about using rakkup’s visual organization to explore your crag. Many climbing areas are large, with widely-spread rock formations and broken-up lines of routes. To help you navigate through more complex areas, rakkup guides organize routes into areas and sub-areas called “sectors.” Your initial view of a guidebook shows the top-level areas with information about each one. With a tap, you can “drill down” to see Sectors and Climbs.
Explore a climbing area visually
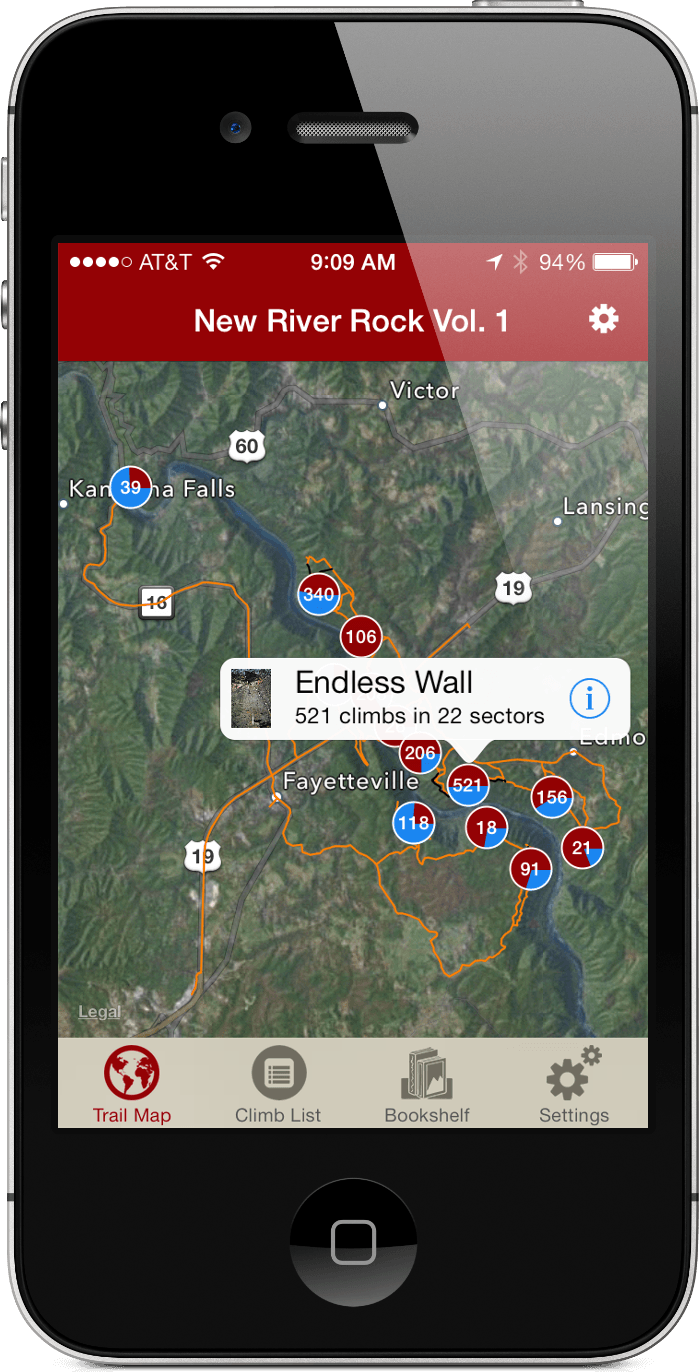
In the same way, you can see sectors and sub-sectors as you zoom into the Trail Map. The initial view shows the entire area and the largest walls. As you zoom, smaller sectors and sub-sectors become visible on the map.
For example, you’d start with a valley with groups of boulders. Next, you’d zoom to one set of boulders. Finally, you’d tap an individual boulder to see its routes.
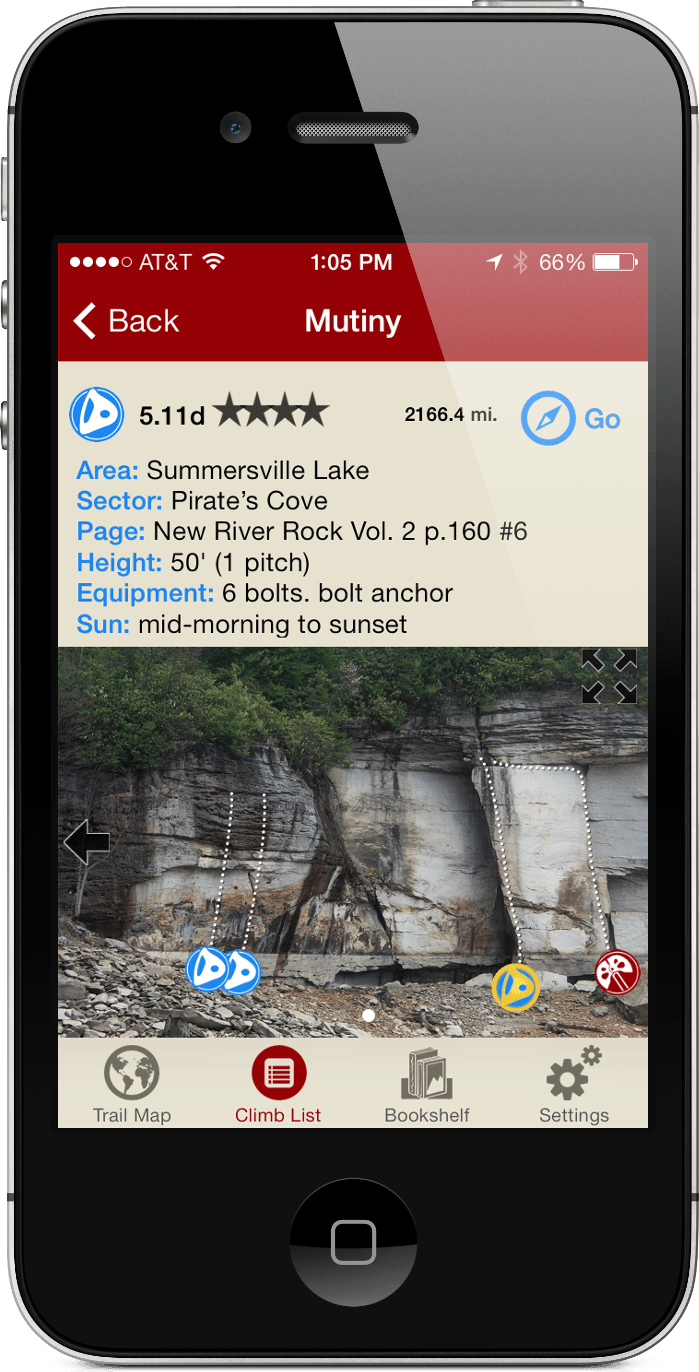
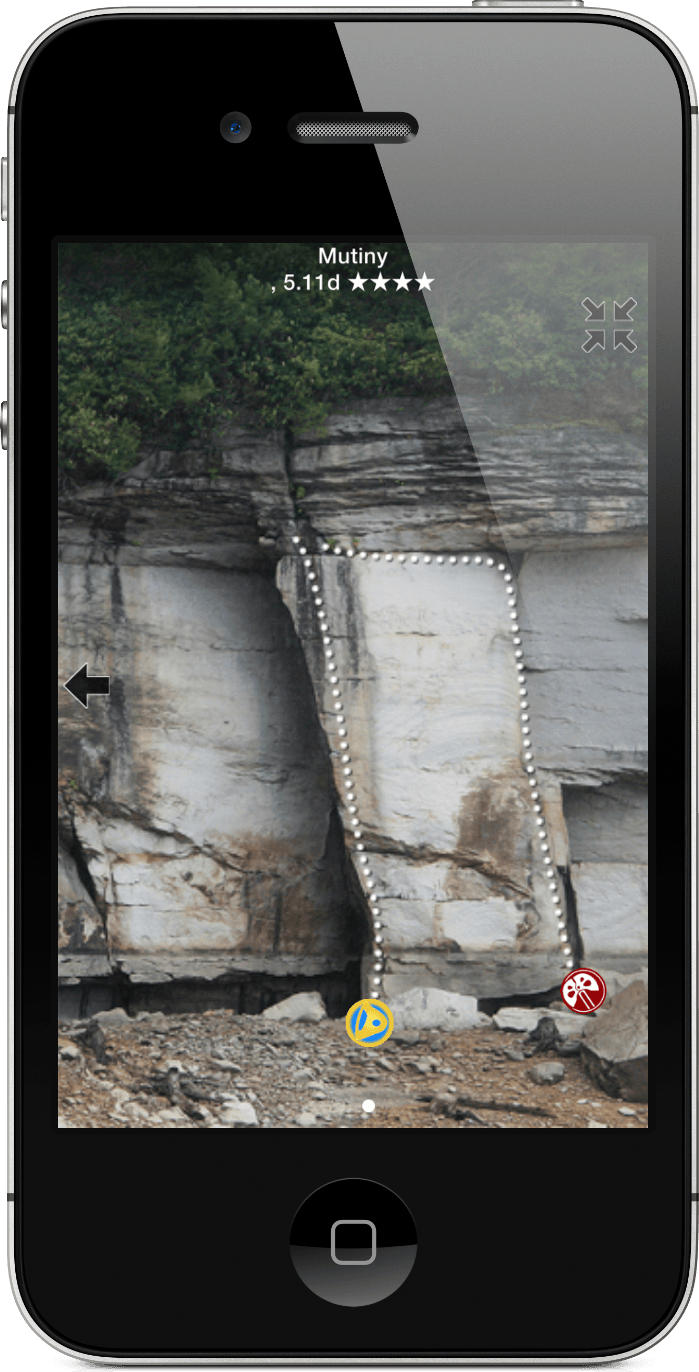
When you tap a sector, the map centers that sector in your map view. You can see summary info for the area or the sector. From there, dive into the climb descriptions, keyed to their own map or topo view.

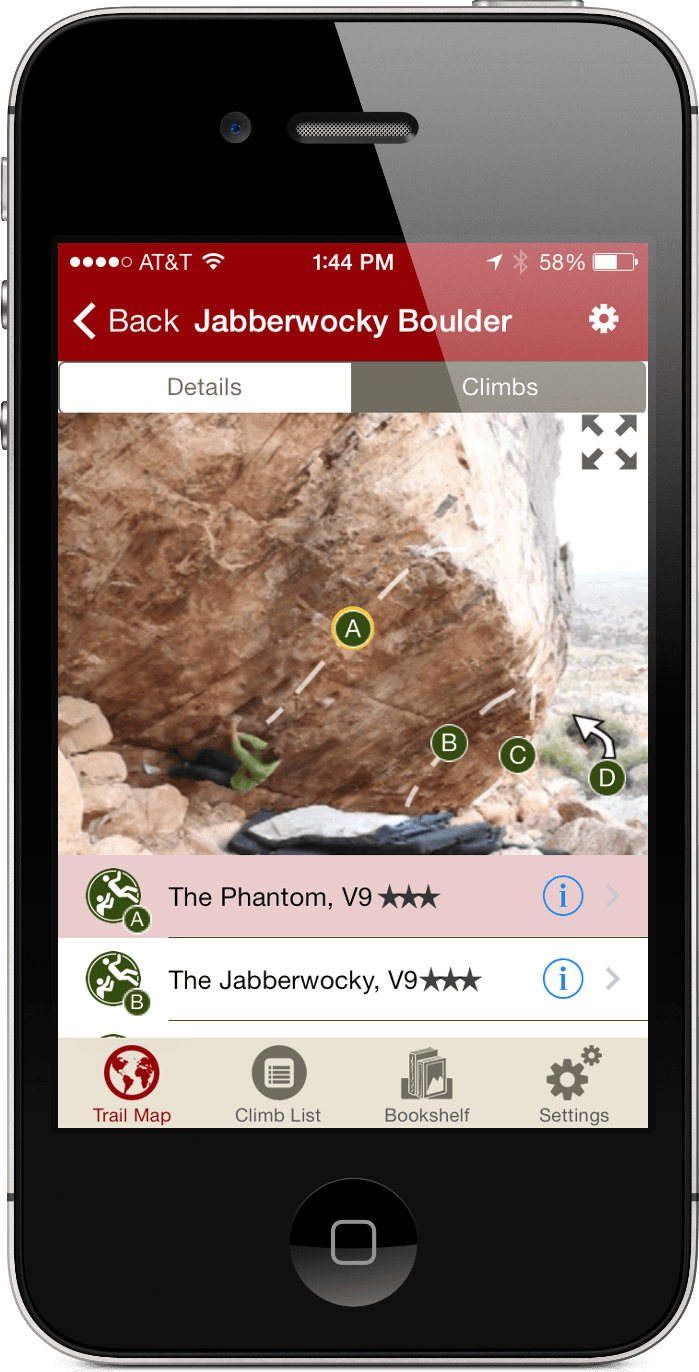
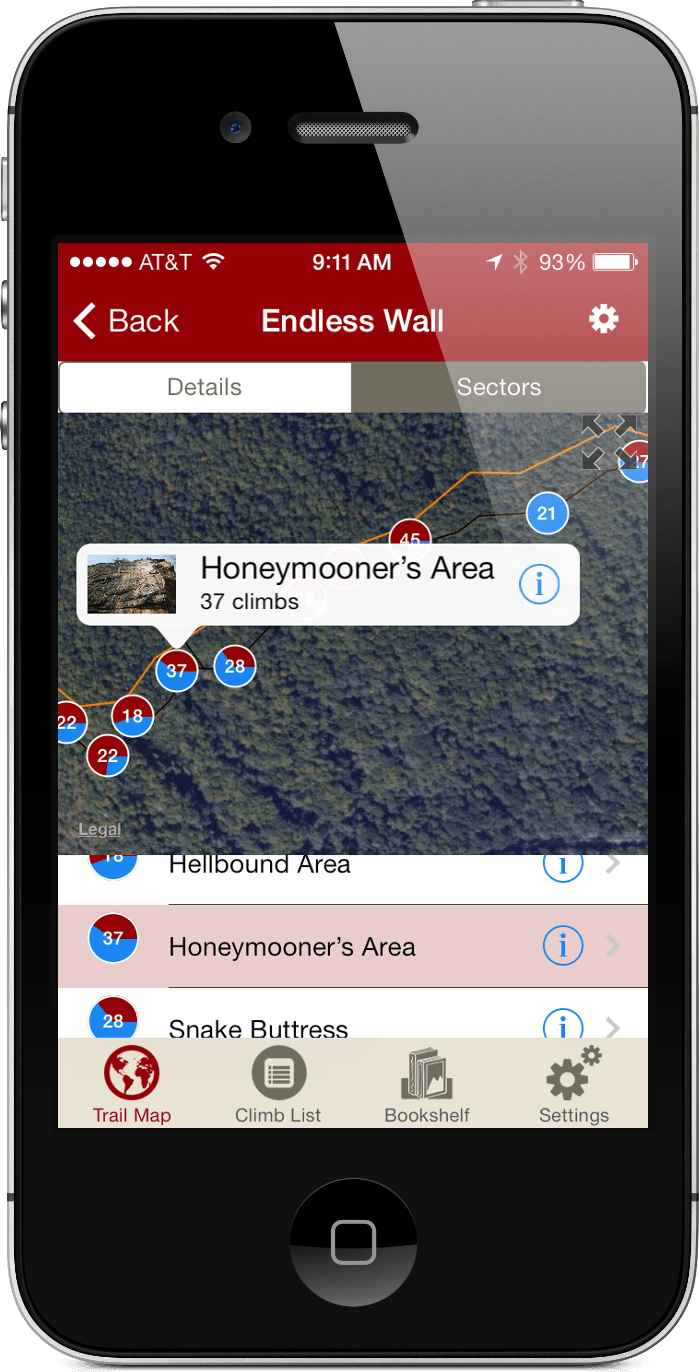
Overview photos show selected routes
A great way to browse is with overview photos. Every climb is labeled on at least one overview photo with a color-coded symbol so you can see at a glance which climb is which and orient yourself right away.
Tap any climb in the list, or tap any symbol on the photo or topo. You’ll move to the route description right away.